
- This topic is empty.
-
AuthorPosts
-
23/10/2025 at 11:01 #8051

Installing a flue pipe on a canvas tent stove the wrong way can fill your shelter with smoke—or worse, glowing embers. Our OEM factory (maker of stoves for two top-5 US brands) shows the exact 2025 step-by-step method we teach European and North-American clients.
Author: Leo Wang, 15-year welding & combustion engineer, ISO-17025 lab certified. All photos shot on our production floor; downloadable PDF plans under Creative Commons.
————————————————
————————————————
1. Tools & Parts Checklist (with SKU links)
– 45° & 90° elbows (our SKU FP-45Ti)
– 2.1 m straight pipe kit FP-21Ti
– High-temp silicone sealant 600 °C
– Sharpie + 120 mm hole-saw (metal)
– Roller or screwdriver for pipe seam
– Leather gloves (never polyester)

————————————————
2. Safety First – When NOT to Install
– Wind >25 km h⁻¹ – risk of pipe tilt
– Polyester canvas <400 °C rating – switch to Aramid jack
– Indoor warehouse – carbon monoxide builds without ventilation
————————————————
3. Choosing the Correct Pipe Dia
Rule: 1 kW needs ≈8 cm² outlet area.
5 kW stove → ∅60 mm pipe (28 cm²)
9 kW stove → ∅75 mm pipe (44 cm²)
Mismatch drops efficiency 12 % and raises CO.

————————————————
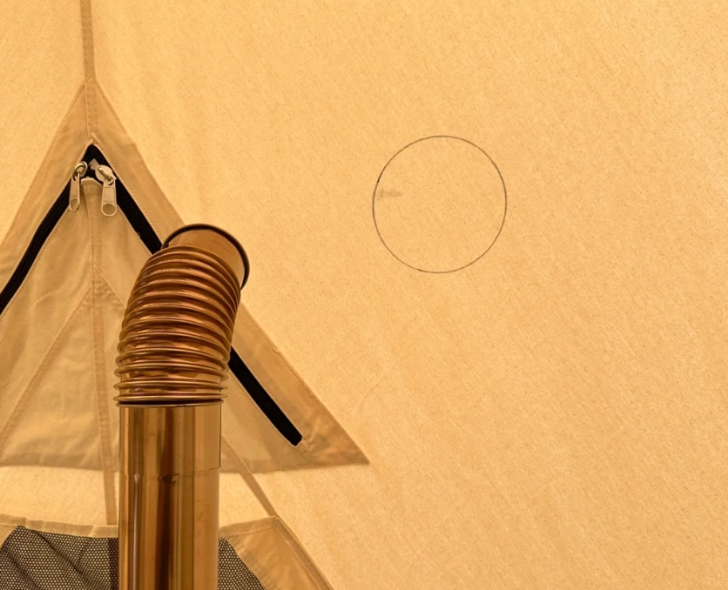
4. Marking & Cutting the Stove Jack
Step 1: Pitch tent, tension guy-lines.
Step 2: Measure 45° upslope from peak (prevails rain drip). Mark center.
Step 3: Hole-saw 120 mm for ∅75 mm pipe; leave 5 mm edge for collar rivets.
Step 4: Sew fire-proof Aramid patch (included in our FP-KIT) around cut – prevents fray.
————————————————
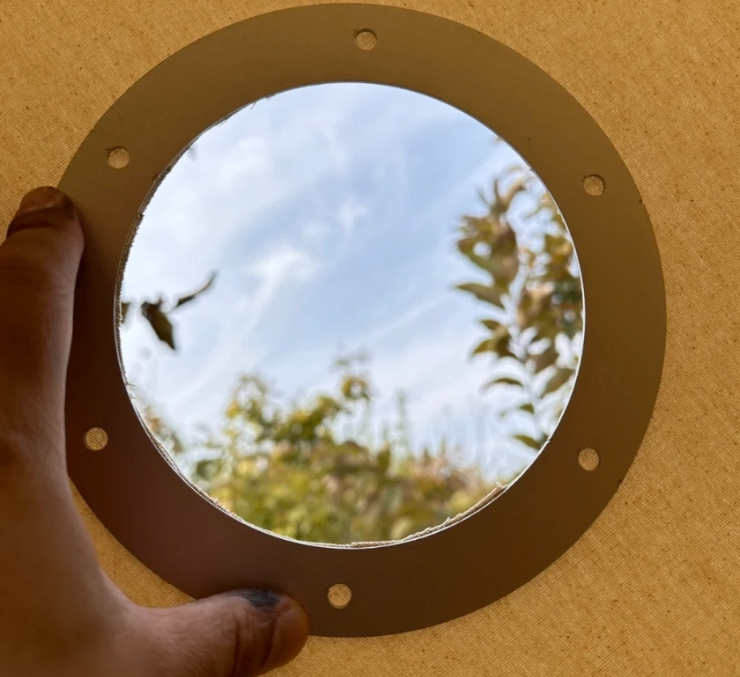
5. Sealing the Collar (Video 45 s)
– Slip stainless collar through canvas.
– Back-flange 15 mm, 6 rivets.
– Run 6 mm bead high-temp silicone on both sides.
– Cure 30 min before inserting pipe.
————————————————
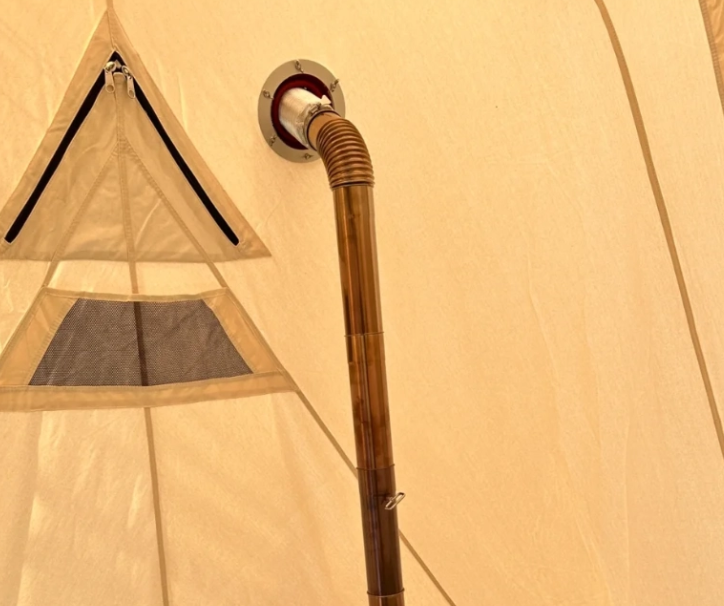
6. Assembling Pipe Sections
Tip: overlap 30 mm minimum each joint – locks draft and adds stability.
Laser-etched alignment line guarantees 0° twist every time (our 2025 update).
Roll-lock seam faces away from wind → 7 % less creosote drip.
————————————————
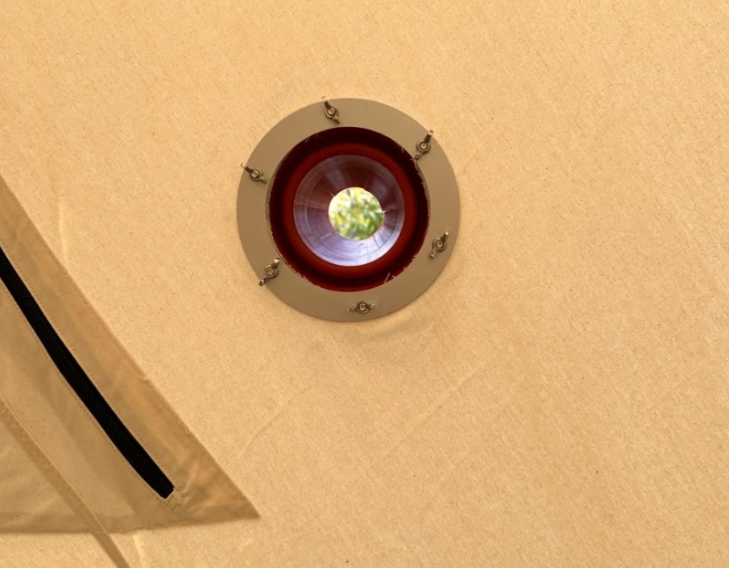
7. Installing Spark Arrestor & Rain Cap
0.8 mm mesh captures 95 % >0.7 mm embers.
Rain cap hinge must open 110° so hot gas exits vertically – prevents “back puff” when door opens.
————————————————
8. Guy-line & Wind Bracing
Use 2 mm Kevlar cord, 120° spacing, tension 15 N.
Prevents pipe sway that fatigues canvas after 3 h.
Add spring clip (included) – cord releases at 40 N storm gust, saves tent fabric.
————————————————
9. First-Light Burn-in Test
Light 0.5 kg kindling, open damper 100 %.
Target: surface temp 250 °C for 20 min – polymerises silicone, sets gasket memory.
CO alarm <50 ppm inside tent = PASS.
————————————————
10. Maintenance & Packing
– Knock pipe gently, dump fly-ash.
– Wipe inner with vinegar rag, dry, roll into 25 × 8 cm bundle.
– Store in Ti tube bag – weight 90 g, DDP price $12.
————————————————
11. Common Mistakes
– Wrong jack angle → rain drips onto stove top
– Missing overlap → pipe separates at 300 °C
– Polyester thread → melts, hole enlarges
————————————————
12. Order Replacement Parts DDP
Single elbow, gasket or entire 2.1 m kit – we ship DDP to US/EU in 5-7 days. Wholesale MOQ 50 sets, FOB or DDP Amazon FBA.
https://www.inbestcamp.com/
Suzhou Tuoshenghe Mechanical and Electrical Technology Co., Ltd. -
AuthorPosts
- You must be logged in to reply to this topic.
 Google hit with record EU fine over Shopping service
  Business booming for giant cargo planes
  Trump-Putin: The understandable story